
Quick Summary
This post covers a practical testing approach for Vue 3 applications:
- Composable unit tests for fast logic verification
- Integration tests with Vitest browser mode for realistic user flows
- Accessibility and visual tests for critical screen checks
- Simplified data factories to manage test data easily
Table of Contents
Open Table of Contents
- Introduction
- Before We Start: A Mini Glossary
- Your Architecture Shapes Your Testing Strategy
- The Testing Pyramid
- The Environment: Browser Mode vs JSDOM
- Layer 1: Composable Unit Tests
- Managing Test Data with Factories
- Layer 2: Integration Tests
- Layer 3: Accessibility and Visual Tests
- Why Not End-to-End (E2E) Tests?
- Comparison: Testing Approaches
- Summary: Your Next Steps
- Bonus: Performance Testing in CI
- Beyond the Pyramid: AI-Powered QA
- Additional Resources
Introduction
I’m building a workout tracking PWA with Vue 3, and I needed confidence that my changes work. Not the “I clicked around and it seems fine” kind of confidence, but the “I can refactor this and know immediately if I broke something” kind.
Here’s the thing: I don’t write much code myself anymore. AI tools handle most of the implementation. I describe what I want, review the changes, and guide the direction—but the actual keystrokes? That’s the AI. This workflow is incredibly productive, but it comes with a catch: I need a robust safety net.
When an AI writes code, tests become even more critical. They serve three purposes:
- Catch bugs before users do
- Enable refactoring — change code freely knowing tests will catch regressions
- Document behavior — tests act as a “user manual” for your code
Don't Forget the Basics
Tests are just one part of your safety net. Linting (ESLint) catches code style issues and potential bugs statically. Type checking (TypeScript) catches type errors at compile time. Run all three—lint, type check, and tests—before every commit.
Before We Start: A Mini Glossary
Testing has a lot of jargon. Here’s a cheat sheet to keep handy as you read:
| Term | Meaning |
|---|---|
| Unit Test | Testing a tiny, isolated piece of code (like a single function) to ensure it returns the right value |
| Integration Test | Testing how multiple pieces work together (e.g., clicking a button and seeing a database update) |
| Regression | A bug where a feature that used to work stops working after you change something else |
| Mock | A fake version of a complex tool (like faking an API call) so you can test without relying on the internet |
| Assertion | A line of code that checks if a result matches your expectation (e.g., expect(2 + 2).toBe(4)) |
| A11y | Short for “Accessibility” (there are 11 letters between A and y) |
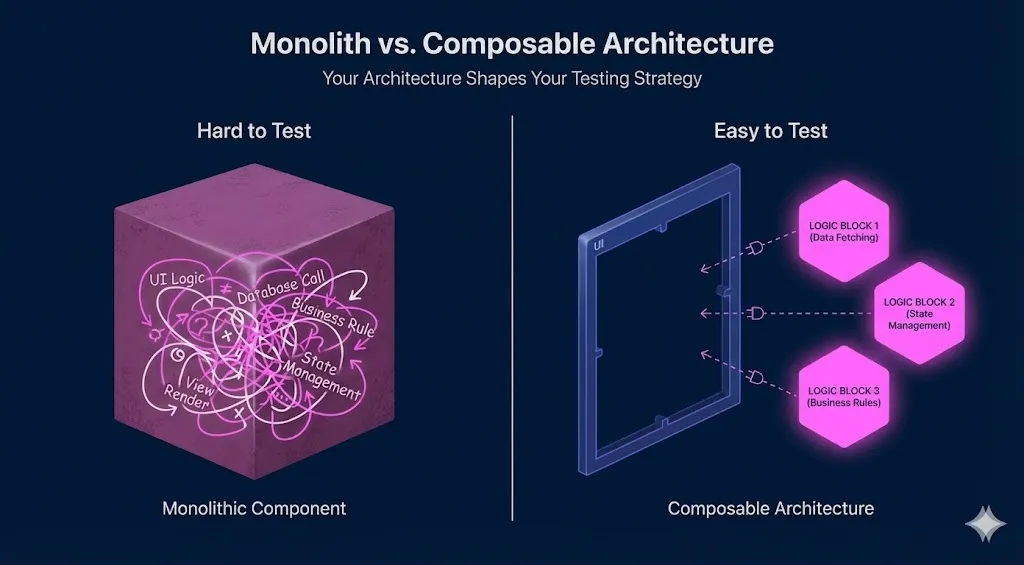
Your Architecture Shapes Your Testing Strategy
Your testing strategy reflects your frontend architecture. They’re not independent choices.
If you write monolithic components (huge files with logic and UI mixed), testing is a nightmare. If you use composables (extracting logic into separate files), testing becomes straightforward.
Bad vs. Good Architecture
The Monolith (Hard to Test)
To test the timer logic here, you have to mount the whole component, find the button, click it, and wait for the UI to update. It’s slow and fragile.
<script setup>
import { ref } from 'vue'
// Logic is trapped inside the component!
const time = ref(0)
const start = () => setInterval(() => time.value++, 1000)
</script>

<template>
  <button @click="start">{{ time }}</button>
</template>
The Composable (Easy to Test)
Here, the logic lives in a plain TypeScript file. We can test useTimer without ever looking at a Vue component or HTML.
// useTimer.ts
export function useTimer() {
  const time = ref(0)
  const start = () => setInterval(() => time.value++, 1000)
  return { time, start }
}
My strategy relies on this “composable-first” approach. However, for the UI itself, we use integration tests. These tests don’t care about your code structure; they test behavior through the UI, just like a user would.
The Testing Pyramid
My approach inverts the traditional pyramid. Integration tests make up ~70% of my test suite because Vitest browser mode makes them fast and reliable. Composable unit tests cover ~20% for pure logic, and the remaining ~10% goes to accessibility and visual regression tests.

The Environment: Browser Mode vs JSDOM
In the past, most Vue tests ran in JSDOM. Now, I recommend Vitest Browser Mode with vitest-browser-vue. Here’s why:
| Feature | JSDOM (Old Standard) | Vitest Browser Mode (New Standard) |
|---|---|---|
| What is it? | A simulation of a browser running in Node.js (Fake) | A real instance of Chrome/Firefox running your tests (Real) |
| Accuracy | Good for logic, bad for layout/CSS | 100% accurate — it’s a real browser |
| Debugging | Hard. You stare at console logs | Easy. You can watch the test click buttons on your screen |
| Speed | Surprisingly slow (see benchmarks below) | Often faster due to native browser APIs |
| API | Requires Testing Library for DOM queries | Built-in page object with Playwright-like locators |
Real-World Performance Comparison
A common misconception is that browser mode is slower. In my testing with the same test suite, browser mode was actually 4x faster:
| Metric | Vitest Browser Mode (Chromium) | Vitest Unit Mode (JSDOM) |
|---|---|---|
| Total Duration | 13.59s 🚀 | 53.72s |
| Test Files | 15 | 15 |
| Total Tests | 82 (78 passed) | 82 (78 passed) |
| Setup Time | 4.48s | 53ms |
| Import Time | 19.84s | 7.98s |
| Test Execution Time | 29.48s | 40.53s |
While browser mode has higher setup time (launching Chromium), the actual test execution is faster because it uses native browser APIs instead of JSDOM’s JavaScript reimplementation. The total duration speaks for itself.
Setting Up Vitest Browser Mode
Vitest 4.0+ requires a browser provider package. Install the dependencies:
npm install -D vitest @vitest/browser-playwright vitest-browser-vue playwrightProvider Options
You can use @vitest/browser-playwright (recommended) or @vitest/browser-webdriverio. Playwright offers the best developer experience with automatic browser downloads.
No More Testing Library
With Vitest browser mode, you don’t need @testing-library/vue anymore. The page object from vitest/browser provides Playwright-like locators that are more powerful and consistent:
import { page, userEvent } from 'vitest/browser'

// Instead of screen.getByRole(), use page.getByRole()
const button = page.getByRole('button', { name: /submit/i })
await userEvent.click(button)
Layer 1: Composable Unit Tests
Composables are just functions. You test them by calling them and checking the result.
A Simple Composable Test
import { describe, expect, it } from 'vitest'
import { useDialogState } from '@/composables/useDialogState'

describe('useDialogState', () => {
  it('starts closed', () => {
    // 1. Run the code
    const { isOpen } = useDialogState()
    // 2. Assert the result
    expect(isOpen.value).toBe(false)
  })

  it('opens when requested', () => {
    const { isOpen, open } = useDialogState()
    open()
    expect(isOpen.value).toBe(true)
  })
})
No HTML, no mounting, no complexity. Just functions and values.
Managing Test Data with Factories
When writing tests, you constantly need data. For example, to test a “Profile Page,” you need a “User.”
Beginners often copy-paste the same big object into every single test file. This is messy and hard to maintain. If you add a new required field (like phoneNumber) to your User, you have to go back and fix every single test.
The solution is the Factory Pattern. Think of it like ordering a pizza: there’s a “standard” pizza (Cheese & Tomato), and you only specify the changes you want (“…but add pepperoni”).

The Problem: Hard-coded Data
Without factories, your tests look like this. Notice how much noise there is just to test one specific thing:
// ❌ BAD: Repeating data everywhere
it('shows admin badge', () => {
  const user = {
    id: '1',
    name: 'John Doe',
    email: 'john@example.com',
    role: 'admin', // This is the only line we actually care about!
    isActive: true,
    createdAt: '2023-01-01'
  }

  // ... test logic ...
})
The Solution: A Simple Factory Function
A factory is just a plain TypeScript function. It holds the “Standard Pizza” defaults and lets you overwrite specific slices using the spread operator (...).
// factories/userFactory.ts

// 1. Define the shape of your data
interface User {
  id: string;
  name: string;
  role: 'user' | 'admin';
  isActive: boolean;
}

// 2. Define your "Standard Pizza" (Sensible Defaults)
const defaultUser: User = {
  id: '123',
  name: 'Test User',
  role: 'user',
  isActive: true
}

// 3. The Factory Function
// It takes "overrides" (partial data) and merges them on top of the defaults
export function createUser(overrides: Partial<User> = {}): User {
  return {
    ...defaultUser, // Start with defaults
    ...overrides    // Apply your specific changes
  };
}
Using It in Tests
Now your tests focus purely on what matters for that specific scenario:
// ✅ GOOD: Clean and focused

// Scenario 1: I just need ANY user, I don't care about details
const basicUser = createUser();
// Result: { id: '123', name: 'Test User', role: 'user', ... }

// Scenario 2: I specifically need an ADMIN
const admin = createUser({ role: 'admin' });
// Result: { id: '123', name: 'Test User', role: 'admin', ... }

// Scenario 3: I need an INACTIVE user
const bannedUser = createUser({ isActive: false });
// Result: { id: '123', name: 'Test User', isActive: false, ... }
This pattern keeps your tests readable and makes refactoring easy. If you add a new field to User later, you only update the defaultUser object in one place.
Factories Work at Every Layer
The beauty of factories is that they work for both unit tests and integration tests:
// ✅ Unit Test: Testing a composable
it('formats user display name', () => {
  const user = createUser({ name: 'Jane Doe', role: 'admin' })
  const { displayName } = useUserProfile(user)
  expect(displayName.value).toBe('Jane Doe (Admin)')
})

// ✅ Integration Test: Testing a rendered component
it('shows admin badge in profile', async () => {
  const admin = createUser({ role: 'admin' })
  await renderProfilePage({ user: admin })
  await expect.element(page.getByText('Admin')).toBeVisible()
})
Key Insight: Factories handle data. They don’t care whether you’re testing a function or a full page—they just give you clean, predictable objects.
Layer 2: Integration Tests
Integration tests verify complete user flows. They render the app, click buttons, and check if the right things appear on screen.
Integration Test vs E2E Test: What's the Difference?
In this post, integration test means:
- Real browser (Vitest browser mode)
- Real Vue components, router, Pinia, and user interactions
- Mocked: external APIs (via MSW), browser storage (IndexedDB), third-party services
E2E test means:
- Real browser
- Zero mocking—full stack (frontend + backend + database)
- Tests exactly how a user interacts with the production system
Examples: In my workout tracker, I mock IndexedDB but test real Vue components and user flows—that’s an integration test. For an e-commerce site, you’d mock the product API and payment gateway via MSW, but test the real checkout flow. If you spin up your actual backend and database, that’s E2E.
Component Tests vs. Integration Tests
Vitest browser mode supports two approaches:

| Approach | What you render | Use case |
|---|---|---|
| Component test | Single component (render(MyButton)) | Testing component behavior in isolation |
| Integration test | Full app (render(App) with router, store) | Testing complete user flows across multiple components |
Component tests are faster and more focused—great for testing a single component’s props, events, and states.
Integration tests render your entire App.vue with router and Pinia. The user can navigate between pages, fill forms, and see how components work together. This is where you catch bugs that only appear when components interact.
For most Vue apps, I recommend focusing on integration tests. They give you more confidence because they test what users actually experience.
The “Test App” Helper
To make testing easier, I use a helper function called createTestApp. It sets up your Router, Pinia (state), and renders your app using vitest-browser-vue so you don’t have to repeat it in every file.
// helpers/createTestApp.ts
export async function createTestApp() {
  // ... setup router, pinia, render app ...

  return {
    router,       // The navigation system
    cleanup       // A function to tidy up after the test
  }
}
Full implementation example
// helpers/createTestApp.ts
import type { RouteLocationRaw, Router } from 'vue-router'
import { render } from 'vitest-browser-vue'
import { page } from 'vitest/browser'
import { expect } from 'vitest'
import { flushPromises } from '@vue/test-utils'
import { createPinia } from 'pinia'
import { createMemoryHistory, createRouter } from 'vue-router'
import App from '@/App.vue'
import { routes } from '@/router'
import { useExercisesStore } from '@/stores/exercises'
import { i18n } from '@/i18n'
import en from '@/i18n/messages/en'
import {
  CommonPO,
  BuilderPO,
  ActiveWorkoutPO,
  QueuePO,
  BenchmarksPO,
  BenchmarkFormPO,
  BenchmarkDetailPO,
} from './pages'

type CreateTestAppOptions = {
  initialRoute?: string
}

type TestApp = {
  router: Router
  container: Element
  // Page Objects
  common: CommonPO
  builder: BuilderPO
  workout: ActiveWorkoutPO
  queue: QueuePO
  benchmarks: BenchmarksPO
  benchmarkForm: BenchmarkFormPO
  benchmarkDetail: BenchmarkDetailPO
  // Raw query methods (use page.getBy* for new code)
  getByRole: typeof page.getByRole
  getByText: typeof page.getByText
  getByTestId: typeof page.getByTestId
  queryByRole: typeof page.getByRole
  queryByText: typeof page.getByText
  findByRole: typeof page.getByRole
  findByText: typeof page.getByText
  // Helpers
  navigateTo: (to: RouteLocationRaw) => Promise<void>
  cleanup: () => void
}

export async function createTestApp(options: CreateTestAppOptions = {}): Promise<TestApp> {
  const { initialRoute = '/' } = options

  const pinia = createPinia()
  const router = createRouter({
    history: createMemoryHistory(),
    routes,
  })

  if (initialRoute !== '/') {
    router.push(initialRoute)
  }

  // Preload English messages for tests
  i18n.global.setLocaleMessage('en', en)
  i18n.global.locale.value = 'en'

  const screen = render(App, {
    global: {
      plugins: [router, pinia, i18n],
    },
  })

  await router.isReady()

  // Flush Vue's async operations to ensure onMounted fires
  await flushPromises()

  // Wait for app initialization to complete (exercises seeding and loading)
  const exercisesStore = useExercisesStore(pinia)
  await expect
    .poll(() => exercisesStore.customExercises.length, { timeout: 5000 })
    .toBeGreaterThan(0)

  // Create context for page objects
  const context = { router }

  // Instantiate page objects
  const common = new CommonPO(context)
  const builder = new BuilderPO(context, common)
  const workout = new ActiveWorkoutPO(context, common)
  const queue = new QueuePO(context, common)
  const benchmarks = new BenchmarksPO(context, common)
  const benchmarkForm = new BenchmarkFormPO(context, common)
  const benchmarkDetail = new BenchmarkDetailPO(context, common)

  // Simple navigation helper
  async function navigateTo(to: RouteLocationRaw) {
    await router.push(to)
  }

  // vitest-browser-vue cleans up before tests automatically
  // This is kept for backward compatibility with test structure
  function cleanup() {
    screen.unmount()
  }

  return {
    router,
    container: screen.container,
    // Page Objects
    common,
    builder,
    workout,
    queue,
    benchmarks,
    benchmarkForm,
    benchmarkDetail,
    // Raw query methods - use page locators (return Locators, not HTMLElements)
    getByRole: page.getByRole.bind(page),
    getByText: page.getByText.bind(page),
    getByTestId: page.getByTestId.bind(page),
    queryByRole: page.getByRole.bind(page),
    queryByText: page.getByText.bind(page),
    findByRole: page.getByRole.bind(page),
    findByText: page.getByText.bind(page),
    // Helpers
    navigateTo,
    cleanup,
  }
}Note
This isn’t a library you download. It’s a helper file you write once for your project to handle the setup boilerplate.
A Real Integration Test
Notice how we use getByRole to find elements—this ensures our app is accessible:
import { page, userEvent } from 'vitest/browser'

it('completes a set', async () => {
  await createTestApp()

  // 1. Find the "Start" button and click it
  await userEvent.click(page.getByRole('button', { name: /start/i }))

  // 2. Type "100" into the weight input
  const weightInput = page.getByRole('spinbutton', { name: /weight/i })
  await userEvent.type(weightInput, '100')

  // 3. Click "Complete"
  await userEvent.click(page.getByRole('button', { name: /complete/i }))

  // 4. Wait for the success message
  await expect.element(page.getByText('Set Completed')).toBeVisible()
})getByRole = Built-in Accessibility Testing
Always prefer getByRole() over getByTestId() or CSS selectors. When you use getByRole('button', { name: /submit/i }), you’re asserting that:
- The element has the correct ARIA role (it’s actually a button)
- The element has an accessible name (screen readers can announce it)
- The element is visible and interactive
If your test can’t find an element by role, that’s a signal your UI has an accessibility problem—fix the component, not the test. Reserve getByTestId only for elements that truly have no semantic meaning.
Page Objects: Handling DOM Interaction
As your test suite grows, you’ll notice repetitive DOM queries everywhere. Page Objects solve this by encapsulating all DOM interactions for a specific page or component.
Key Difference: Factories handle data (creating test objects). Page Objects handle DOM interaction (clicking, typing, querying elements). They complement each other.
// pages/WorkoutPage.ts
import { page, userEvent } from 'vitest/browser'

export class WorkoutPage {
  // Queries - finding elements
  get startButton() {
    return page.getByRole('button', { name: /start/i })
  }

  get weightInput() {
    return page.getByRole('spinbutton', { name: /weight/i })
  }

  // Actions - user interactions
  async start() {
    await userEvent.click(this.startButton)
  }

  async setWeight(value: number) {
    await userEvent.clear(this.weightInput)
    await userEvent.type(this.weightInput, String(value))
  }

  async completeSet() {
    await userEvent.click(page.getByRole('button', { name: /complete/i }))
  }
}
Now your tests read like plain English:
import { page } from 'vitest/browser'

it('completes a set with weight', async () => {
  const workoutPage = new WorkoutPage()

  await workoutPage.start()
  await workoutPage.setWeight(100)
  await workoutPage.completeSet()

  await expect.element(page.getByText('Set Completed')).toBeVisible()
})| Helper | Handles | Used In |
|---|---|---|
| Factories | Test data (objects, entities) | Unit tests, Integration tests |
| Page Objects | DOM interaction (clicks, queries) | Integration tests only |
This approach aligns with black box testing principles—testing behavior rather than implementation details.
Stop White Box Testing Vue Components Stop White Box Testing Vue Components Use Testing Library Instead White Box testing makes your Vue tests fragile and misleading. In this post, I’ll show you how Testing Library helps you write Black Box tests that are resilient, realistic, and focused on actual user behaviorLayer 3: Accessibility and Visual Tests
These are the “cherries on top” of your pyramid.
Accessibility (A11y)
We use a tool called axe-core. It scans your rendered HTML for common violations (like low contrast text or missing labels).
it('has no accessibility violations', async () => {
  const { container } = await createTestApp()

  // This one line checks for dozens of common a11y bugs!
  await assertNoViolations(container)
})Visual Regression
This takes a screenshot of your component and compares it to a “golden” version saved on your computer. If a pixel changes, the test fails.
it('matches the design', async () => {
  await expect(page.getByTestId('app')).toMatchScreenshot('settings-page.png')
})
Use this sparingly. Visual tests are brittle (even a font rendering update can break them), so only use them for critical screens.
Testing Your Core UI Library
There’s one place where visual regression and accessibility tests shine: your base component library.
If you’re building your own UI components (BaseButton, DatePicker, Modal, Input), these components should be:
- Dumb — no business logic, just presentation
- Reusable — used across your entire app
- Stable — rarely change once built
This makes them perfect candidates for visual and accessibility testing:
// BaseButton.visual.spec.ts
describe('BaseButton', () => {
  it('renders all variants correctly', async () => {
    render(ButtonStory) // A component showing all button states
    await expect(page).toMatchScreenshot('button-variants.png')
  })

  it('has no accessibility violations', async () => {
    const { container } = render(BaseButton, {
      props: { label: 'Click me' }
    })
    await assertNoViolations(container)
  })
})
For each base component, test:
| Test Type | What to Check |
|---|---|
| Visual | All variants (primary, secondary, disabled, loading) |
| A11y | Focus states, ARIA attributes, color contrast |
| Keyboard | Tab navigation, Enter/Space activation |
Why Not End-to-End (E2E) Tests?
You might hear people say, “Just use Cypress or Playwright for everything!”
E2E tests mean zero mocking—you run your real backend and database. They test your entire stack: Frontend + Backend + Database.
For a new developer or a solo project, this is painful because:
- It’s slow
- It breaks easily (if the backend API is down, your frontend tests fail)
The Alternative: Mocking
Instead, we use MSW (Mock Service Worker). It intercepts network requests and returns fake data immediately. This makes your integration tests fast and stable. You don’t need a running backend to test your frontend.
The Golden Rule of Mocking
The less you mock, the better your tests. Every mock is a lie you’re telling your test suite. Mock only what you can’t control:
- External APIs (network calls to third-party services)
- System boundaries (time, random numbers, file system)
- Paid services (payment gateways, SMS providers)
Never mock your own code just to make tests easier. If a component is hard to test without mocking internal modules, that’s a sign your architecture needs refactoring—not more mocks.
What about Contract Testing?
In large corporate teams, you might use “Contract Testing” to ensure your mocks match the real API. For now, don’t worry about it. Focus on getting your integration and unit tests running smoothly.
Comparison: Testing Approaches
| Layer | Speed | Confidence | Flakiness | Distribution | When to Use |
|---|---|---|---|---|---|
| Unit Tests (Composables) | ⚡ Very fast | Medium | None | ~20% | Logic validation, utility functions |
| Integration Tests (Browser) | 🚀 Fast | High | Low | ~70% | User flows, component interaction |
| A11y Tests | 🚀 Fast | High | Medium | ~5% | Critical screens, forms |
| Visual Regression | 🐢 Slow | Medium | High | ~5% | Design system components |
Summary: Your Next Steps
Don’t try to implement the whole pyramid today. Start with what matters most.
Step 1: Identify What Can Never Fail
Ask yourself: “What flows in my app would be catastrophic if they broke?” For an e-commerce site, that’s checkout. For a banking app, that’s transfers. For my workout tracker, it’s completing a set.
Write integration tests for these critical paths first using Vitest browser mode. Even 3-5 tests covering your core flows provide massive confidence.
Step 2: Set Up the Infrastructure
Get Vitest browser mode running with a simple createTestApp helper. Once you can render your app and click a button in a test, you have the foundation for everything else.
Step 3: Write Tickets with Testable Acceptance Criteria
Good tickets have Gherkin-style acceptance criteria that read like tests:
Given I am on the workout page
When I tap "Complete Set"
Then I should see "Set Completed" confirmation
And the set should be saved to history
These ACs translate directly into integration tests. Now you can practice TDD: write the test from the AC first, watch it fail, then implement the feature.
Step 4: Extract Patterns as You Go
Don’t create factories or page objects upfront. Write a few tests with inline data and queries. When you notice repetition, extract it. This way, your abstractions solve real problems instead of imagined ones.
For guidance on writing clear, maintainable test names, check out Frontend Testing Guide: 10 Essential Rules for Naming Tests Frontend Testing Guide: 10 Essential Rules for Naming Tests Learn how to write clear and maintainable frontend tests with 10 practical naming rules. Includes real-world examples showing good and bad practices for component testing across any framework. .
Bonus: Performance Testing in CI
While not part of the traditional testing pyramid, performance budgets catch regressions before they reach production. I run Lighthouse CI on every build to enforce thresholds for performance, accessibility, and best practices.
# .github/workflows/ci.yml
performance-budget:
  needs: build
  runs-on: ubuntu-latest
  timeout-minutes: 10
  steps:
    - name: Checkout code
      uses: actions/checkout@v4.2.2

    - name: Setup pnpm
      uses: pnpm/action-setup@v4.1.0

    - name: Setup Node.js
      uses: actions/setup-node@v4.4.0
      with:
        node-version: ${{ env.NODE_VERSION }}

    - name: Restore node_modules
      uses: actions/cache/restore@v4.2.3
      with:
        path: node_modules
        key: node-modules-${{ runner.os }}-${{ hashFiles('pnpm-lock.yaml') }}

    - name: Download build artifacts
      uses: actions/download-artifact@v6.0.0
      with:
        name: dist
        path: dist

    - name: Run Lighthouse CI
run: pnpm lhci autorunBeyond the Pyramid: AI-Powered QA
There’s a new layer emerging that doesn’t fit neatly into the traditional pyramid: AI-driven testing.
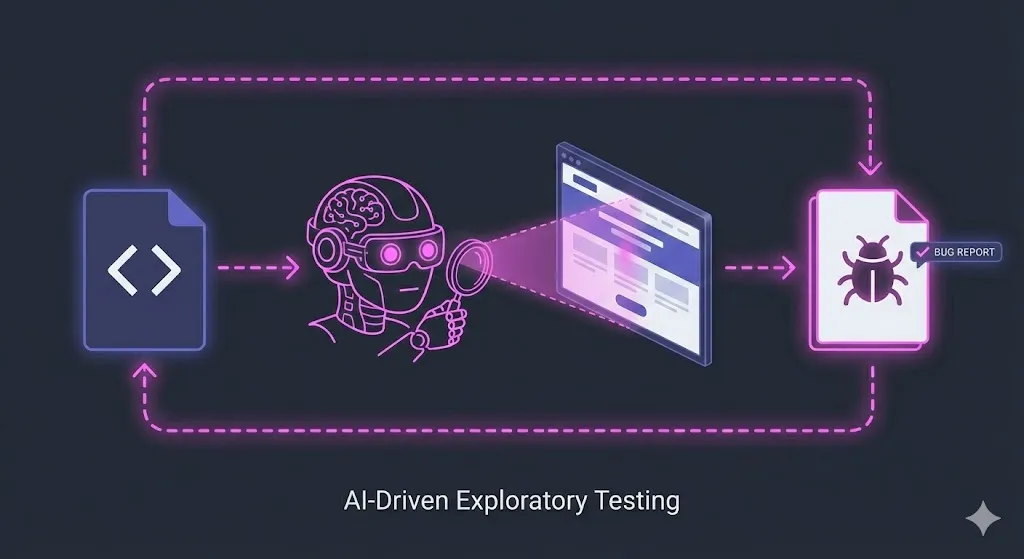
What if you could have an AI test your app the way a real QA engineer would? Not following scripts, but actually exploring your UI, trying edge cases, and writing bug reports?
I’ve been experimenting with exactly this approach. Using Claude Code combined with Playwright’s browser automation, I built an AI QA engineer that:
- Tests my app through the browser like a real user
- Tries unexpected inputs and edge cases automatically
- Runs on every pull request via GitHub Actions
- Posts detailed bug reports with screenshots directly to my PRs
This isn’t a replacement for the testing pyramid—it’s a complement. Your unit and integration tests catch regressions deterministically. AI QA excels at exploratory testing and finding bugs that scripted tests would never think to check.
Additional Resources
- Vitest Browser Mode Guide - The official docs are excellent
- vitest-browser-vue - Vue rendering for Vitest browser mode
- vitest-examples on GitHub - “Hello World” setup examples